 |

|
|
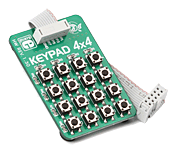
4x4 Key click carries a 16 button keypad. The design of the board - inputs are read by a pair of connected 8-bit parallel-in serial-out shift registers - allows for multiple key presses at the same time. For ease of use, each button has silkscreen markings. The right-most column is marked with letters A-D, the other 12 buttons are marked like a telephone keypad. The board is designed to use either a 3.3V or 5V power supply. |
|
|
|
 |

|
|
The Keypad 4x4 Board features a small keypad with calculator-style arrangement of buttons and can be easily integrated into your prototype device. It is connected to your development system or prototype device via an IDC10 connector. |
|
|
|
 |

|
|
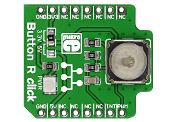
Button R click is the simplest solution for adding a single pushbutton to your design. The button itself is transparent, 6.8mm in diameter and has a red LED backlight. When pressed, it sends an interrupt signal to the target board microcontroller. The backlight LED is controlled separately through the mikroBUS PWM pin, so you can program all kinds of patterns (varying level of light intensity or rate of blinking on subsequent button presses). The board can use either a 3.3V or a 5V power supply. |
|
|
|
 |

|
|
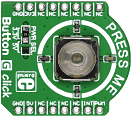
Button G click is the simplest solution for adding a single pushbutton to your design. The button itself is transparent, 6.8mm in diameter and has a green LED backlight. When pressed, it sends an interrupt signal to the target board microcontroller. The backlight LED is controlled separately through the mikroBUS PWM pin, so you can program all kinds of patterns (varying level of light intensity or rate of blinking on subsequent button presses). The board can use either a 3.3V or a 5V power supply. |
|
|
|
 |

