How does it work?
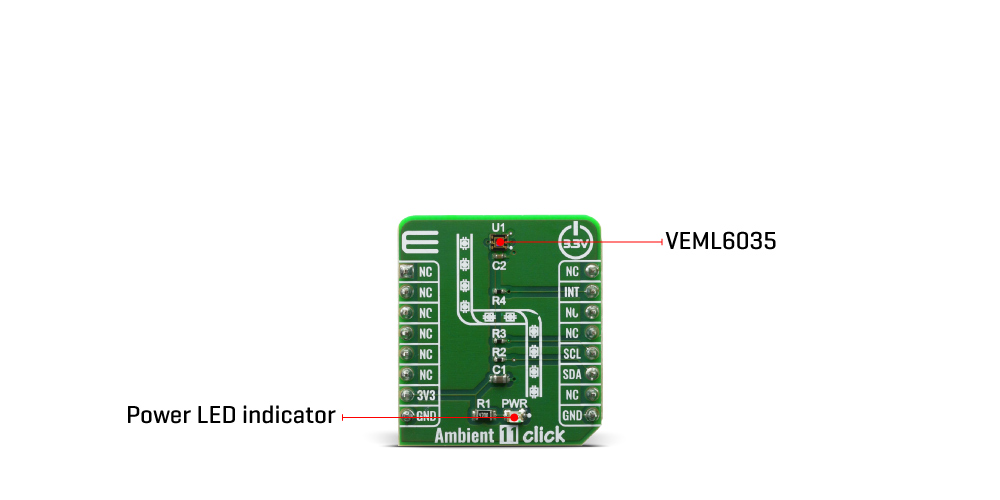
The Ambient 11 Click is based around the VEML6035, which is a 16-bit low power, high sensitivity CMOS ambient light sensor operated via a simple I2C command. This sensor has many features that make it a perfect solution for small designs such as the Ambient 11 Click board™. One of these features is certainly its high level of integration that allows a minimal number of external components.

The sensor offers an active interruption feature that is triggered outside of the threshold window settings eliminating loading on the host. Besides that, VEML6035 has excellent temperature compensation to maintain output stability under changing temperature and its refresh rate setting does not need an external RC low pass filter. There is a programmable shutdown mode which reduces current consumption to 0.5 ??A. Operating voltage ranges from 1.7 V to 3.6 V.
VEML6035 is a cost effective solution of ambient light sensor with I2C bus interface. The standard serial digital interface is easy to access ???Ambient Light Signal??? without complex calculation and programming by external controller. Beside the digital output also a flexible programmable interrupt pin is available.
Given the options its elements can offer, the Ambient 11 Click can be used as an ambient light sensor for mobile devices, industrial lighting operation, and as an optical switch for consumer, computing and industrial devices and displays.
This Click Board™ is designed to be operated only with 3V3 logic level. A proper logic voltage level conversion should be performed before the Click board™ is used with MCUs with logic levels of 5V.
Specifications
| Type |
Optical |
| Applications |
Ambient light sensor for mobile devices, industrial lighting operation, and as an optical switch for consumer, computing and industrial devices and displays |
| On-board modules |
VEML6035, a low power, high sensitivity, I2C ambient light sensor from Vishay Semiconductors |
| Key Features |
Low stand by current consumption: typ. 0.5 ??A; Integrated modules: ambient light sensor (ALS) |
| Interface |
GPIO,I2C |
| Compatibility |
mikroBUS |
| Click board size |
S (28.6 x 25.4 mm) |
| Input Voltage |
3.3V |
Pinout diagram
This table shows how the pinout on Ambient 11 Click corresponds to the pinout on the mikroBUS™ socket (the latter shown in the two middle columns).
| Notes |
Pin |
 |
Pin |
Notes |
|---|
| |
NC |
1 |
AN |
PWM |
16 |
NC |
|
| |
NC |
2 |
RST |
INT |
15 |
INT |
Interrupt |
| |
NC |
3 |
CS |
RX |
14 |
NC |
|
| |
NC |
4 |
SCK |
TX |
13 |
NC |
|
| |
NC |
5 |
MISO |
SCL |
12 |
SCL |
I2C Clock |
| |
NC |
6 |
MOSI |
SDA |
11 |
SDA |
I2C Data |
| Power Supply |
3.3V |
7 |
3.3V |
5V |
10 |
NC |
|
| Ground |
GND |
8 |
GND |
GND |
9 |
GND |
Ground |
Onboard settings and indicators
| Label |
Name |
Default |
Description |
|---|
| LD1 |
PWR |
- |
Power LED Indicator |
Software Support
We provide a library for the Ambient11 Click on our LibStock page, as well as a demo application (example), developed using MikroElektronika compilers. The demo can run on all the main MikroElektronika development boards.
Library Description
This library holds functions that can be used to write data, read raw data, read and calculate ambiental illumination and check for interrupt occurence.
Key functions:
void ambient11_write_data ( uint8_t wr_cmd, uint16_t wr_data ) - Writes 16-bit data into register defined by 8-bit command.uint16_t ambient11_read_data ( uint8_t wr_cmd ) - Reads data from register defined by 8-bit command.float ambient11_calc_illumination ( float typical_res ) - Function is used to calculate ambiental illumination.
Examples description
The application is composed of three sections :
- System Initialization - Initializes I2C module, LOG structure and sets INT pin as input.
- Application Initialization - Initalizes I2C driver, applies low sensitiviti settings ( GAIN = 0, DG = 0, SENS = 1 and IT = 100ms ) and makes an initial log.
- Application Task - (code snippet) This example shows the capabilities of the Ambient 11 click by measuring ambiental illumination and displaying calculated value via USART terminal in luxes.
void application_task ( )
{
    lx_val = ambient11_calc_illumination( resolution );
    FloatToStr( lx_val, log_txt );
    mikrobus_logWrite( "Illumination : ", _LOG_TEXT );
    mikrobus_logWrite( log_txt, _LOG_TEXT );
    mikrobus_logWrite( "lx", _LOG_LINE );

    mikrobus_logWrite( "-------------------------", _LOG_LINE );
    Delay_ms( 2000 );
}
The full application code, and ready to use projects can be found on our LibStock page.
Other mikroE Libraries used in the example:
Additional notes and informations
Depending on the development board you are using, you may need USB UART click, USB UART 2 click or RS232 click to connect to your PC, for development systems with no UART to USB interface available on the board. The terminal available in all MikroElektronika compilers, or any other terminal application of your choice, can be used to read the message.
mikroSDK
This Click board™ is supported with mikroSDK - MikroElektronika Software Development Kit. To ensure proper operation of mikroSDK compliant Click board™ demo applications, mikroSDK should be downloaded from the LibStock and installed for the compiler you are using.
For more information about mikroSDK, visit the official page.
Resources
Downloads

